적대적 생성 신경망, GAN 모델을 활용해서
사람의 얼굴 이미지를 학습시키는 모델을 재현시켜 보겠습니다.
이번 시간에는 딥러닝 세계에서 유명한 데이터셋 중 하나인 CelebA를 활용해서
20만 개 이상의 사람들(유명인)을 학습시키고 아예 새로운 인물의 얼굴 이미지를 만들어주는
신경망 모델을 제작해보겠습니다.
※ 원본 데이터셋의 저작권은 CUHK(The chinese university of Hong Kong)에서 보유하고 있습니다.
CelebA Dataset
Details CelebFaces Attributes Dataset (CelebA) is a large-scale face attributes dataset with more than 200K celebrity images, each with 40 attribute annotations. The images in this dataset cover large pose variations and background clutter. CelebA has larg
mmlab.ie.cuhk.edu.hk

GAN은 2014년, 구글의 데이터 연구자 이언 굿펠로가 창안한 모델로 말그대로 인공지능의
새로운 지평을 열었다고 평가받는 신경망 구조입니다. 당시 기존에 갖고 있던 모델로 그 누구도 생각하지 못한
Generator와 Discriminator라는 혁신적인 모델을 발표한 것입니다.
우리가 간단한 유명인 얼굴을 재현해 본다고 생각해본다면, 이전까지의 시도는 사람이 직접
이미지에 변형을 가하거나, 조작하거나, 색깔을 바꿔보는 등 임의의 과정을 넣어보았습니다.
즉 원본을 가미한 '가짜 이미지'를 만드는 것인데요.
이 가짜 이미지와 진짜 이미지를 classifier로 분류하여 0과 1로 구분하게 하고
이를 반복해서 학습시키는 것이 골자입니다.

하지만 우리가 직접 가짜 이미지를 만드는 것은 한계가 있습니다.
그렇다면 이 역할을 머신에게 맡기는 것은 어떨까요?
완전히 엉뚱한 이미지가 아니라, 최소한 그럴싸한 이미지를 만드는 기계를 만들어 주는 것입니다.
이것이 바로 '생성자(generator)'의 탄생입니다. 반대로 이를 분류하는 기계를 '판별자(Discriminator)'라고
불러줍니다.
그러면 생성자는 맘대로 막 만드는 것이 아니라, 보상과 벌을 주는 과정을 통해
판별자가 이미지를 분류하지 못하면 보상을 주고 판별자가 분류하는데 성공하면 벌을 주는 방향으로
생성자를 좀 더 고성능으로 올려주기 시작합니다.
그러면 생성자와 판별자는 경쟁적으로, 서로를 향해 적대적이면서도 발전하게 됩니다.
이 학습을 동시에 시작하는 것이죠!
이는 이미지 학습에서 장대한 영향을 미치게 됩니다.
다만 이번에 사용할 데이터셋은 규모가 상당히 크기 때문에
포켓몬(809종)과 달리 이미지를 20만여 장에서 2만 장으로 추려서 진행하겠습니다.
그래도 시간은 오래 걸리는건 마찬가지입니다.
import h5py
import zipfile
import imageio
import os
# 이미지를 2만장으로 추립니다.
%%time
hdf5_file = '/content/mount/My Drive/Colab Notebooks/celeba_aligned_small.h5py'
total_images = 20000
with h5py.File(hdf5_file, 'w') as hf:
count = 0
with zipfile.ZipFile('/content/celeba/img_align_celeba.zip', 'r') as zf:
for i in zf.namelist():
if (i[-4:] == '.jpg'):
# extract image
ofile = zf.extract(i)
img = imageio.imread(ofile)
os.remove(ofile)
# add image data to HDF5 file with new name
hf.create_dataset('img_align_celeba/'+str(count)+'.jpg', data=img, compression="gzip", compression_opts=9)
count = count + 1
if (count%1000 == 0):
print("images done .. ", count)
pass
# stop when total_images reached
if (count == total_images):
break
pass
pass
pass
데이터셋을 파이썬 딕셔너리 객체처럼 사용할 수 있는 HDF5 파일을 이용합니다.
여는 것도 딕셔너리와 동일합니다.
with h5py.File('/content/mount/My Drive/Colab Notebooks/celeba_aligned_small.h5py', 'r') as file_object:
   for group in file_object:
      print(group)
      pass
img_align_celeba
사진 한장만 확인차 불러와봅니다.
# 파일 하나만 꺼내보기 (2번)
with h5py.File('/content/mount/My Drive/Colab Notebooks/celeba_aligned_small.h5py', 'r') as file_object:
    dataset=file_object['img_align_celeba']
    image = np.array(dataset['2.jpg'])
    plt.imshow(image, interpolation = 'none')
    plt.axis('off')
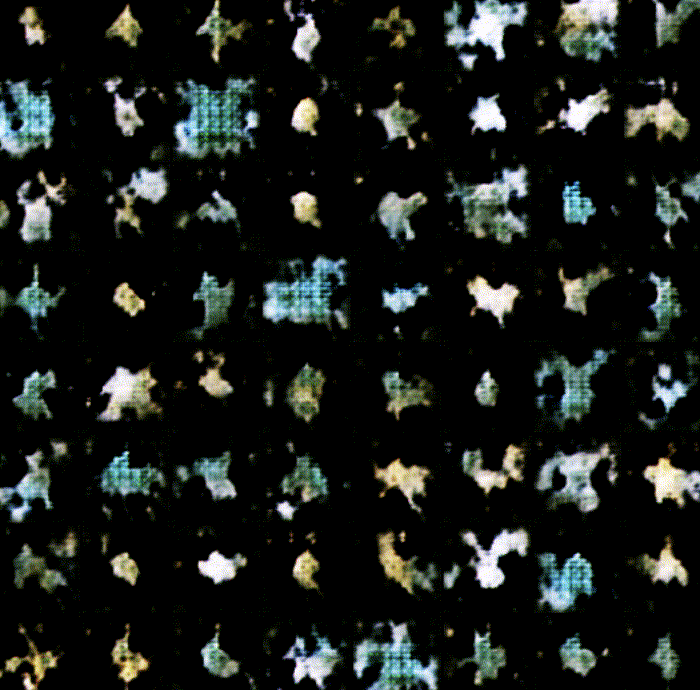
유명인이지만 누군지는 모르는 인물이 나왔습니다.
이제 데이터셋 클래스를 정의해줍니다.
class CelebADataset(Dataset):
     def __init__(self, file):
         self.file_object = h5py.File(file, 'r')
         self.dataset = self.file_object['img_align_celeba']
         pass
     def __len(self):
         return len(self.dataset)
     def __getitem__(self, index):
         if (index >= len(self.dataset)):
            raise IndexError()
         img = np.array(self.dataset[str(index)+'.jpg'])
         return torch.cuda.FloatTensor(img) / 255.0

     def plot_image(self, index):
         plt.imshow(np.array(self.dataset[str(index)+'.jpg']),
                    interpolation = 'nearest')
         pass
     pass
celeba_dataset = CelebADataset('/content/mount/My Drive/Colab Notebooks/celeba_aligned_small.h5py')
랜덤한 데이터셋과 시드값에 대해 정의해주는 함수도 정의합니다.
def generate_random_image(size):
    random_data = torch.rand(size)
    return random_data

def generate_random_seed(size):
    random_data = torch.randn(size)
    return random_data
드디어 가짜 이미지를 잡아줄 판별자를 제시해보겠습니다.
이미지 사이즈를 조정해주는 View 클래스를 미리 정의해줍니다.
사용하는 함수는 LeakyRelu, sigmoid이고
손실 함수는 MSEloss(평균제곱 오차 손실),
최적화 함수는 SGD를 제시해줍니다.
# 판별자

class View(nn.Module):
   def __init__(self, shape):
       super().__init__()
       self.shape = shape,

   def forward(self, x):
       return x.view(*self.shape)

class Discriminator(nn.Module):
   def __init__(self):
       super().__init__()
       self.model = nn.Sequential(
           View(218*178*3),
           nn.Linear(3*218*178,100),
           nn.LeakyReLU(),
           nn.LayerNorm(100),
           nn.Linear(100,1),
           nn.Sigmoid()
       )
       self.loss_function = nn.MSELoss()
       self.optimiser = torch.optim.SGD(self.parameters(), lr = 0.01)
       self.counter = 0;
       self.progress = []

   def forward(self, inputs):
        return self.model(inputs)


   def train(self, inputs, targets):
       outputs = self.forward(inputs)

       loss = self.loss_function(outputs, targets)

       self.counter += 1;
       if (self.counter % 10 == 0):
            self.progress.append(loss.item())
            pass
       if (self.counter % 1000 == 0):
            print("counter = ", self.counter)
            pass


       self.optimiser.zero_grad()
       loss.backward()
       self.optimiser.step()

       pass


   def plot_progress(self):
       df = pd.DataFrame(self.progress, columns=['loss'])
       df.plot(ylim=(0), figsize=(16,8), alpha=0.1, marker='.', grid=True, yticks=(0, 0.25, 0.5, 1.0, 5.0))
       pass

   pass
판별기 테스트
D = Discriminator()
D.to(device)
for image_data_tensor in celeba_dataset:
    D.train(image_data_tensor, torch.cuda.FloatTensor([1.0]))
    D.train(generate_random_image((218,178,3)), torch.cuda.FloatTensor([0.0]))
    pass
그리고 얼굴 데이터셋에 대해 변형된 이미지를 계속 만들어줄 생성자도 정의해줍니다.
최적화함수는 Adam함수를 사용, 손실함수는 위와 동일하게 사용합니다.
class Generator(nn.Module):

    def __init__(self):
        super().__init__()

        self.model = nn.Sequential(
            nn.Linear(100, 3*10*10),
            nn.LeakyReLU(),

            nn.LayerNorm(3*10*10),

            nn.Linear(3*10*10, 3*218*178),

            nn.Sigmoid(),
            View((218,178,3))
        )

        self.optimiser = torch.optim.Adam(self.parameters(), lr=0.0001)

        self.counter = 0;
        self.progress = []

        pass


    def forward(self, inputs):
        return self.model(inputs)


    def train(self, D, inputs, targets):
        g_output = self.forward(inputs)

        d_output = D.forward(g_output)

        loss = D.loss_function(d_output, targets)

        self.counter += 1;
        if (self.counter % 10 == 0):
            self.progress.append(loss.item())
            pass
        self.optimiser.zero_grad()
        loss.backward()
        self.optimiser.step()

        pass


    def plot_progress(self):
        df = pd.DataFrame(self.progress, columns=['loss'])
        df.plot(ylim=(0), figsize=(16,8), alpha=0.1, marker='.', grid=True, yticks=(0, 0.25, 0.5, 1.0, 5.0))
        pass

    pass
그리고 생성자의 임의로 테스트해보고, 결과를 확인해보겠습니다.
output = G.forward(generate_random_seed(100))
img = output.detach().cpu().numpy()
plt.imshow(img, interpolation='none', cmap = 'Blues')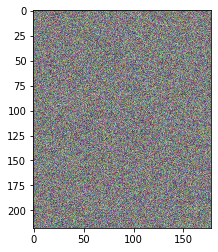
blue 톤의 노이즈가 낀 형태로 생성이 됬네요.
이번 시간에는 에포크를 10회정도 돌려본 후 결과값을 확인하면서
마치겠습니다.
EPOCHS = 10

for epoch in range(1, EPOCHS):
    print(f' 에포크 = {epoch}')

for image_data_tensor in celeba_dataset:
    D.train(image_data_tensor, torch.cuda.FloatTensor([1.0]))
    D.train(G.forward(generate_random_seed(100)).detach(), torch.cuda.FloatTensor([0.0]))
    G.train(D, generate_random_seed(100), torch.cuda.FloatTensor([1.0]))
    pass
pass
D.plot_progress()
G.plot_progress()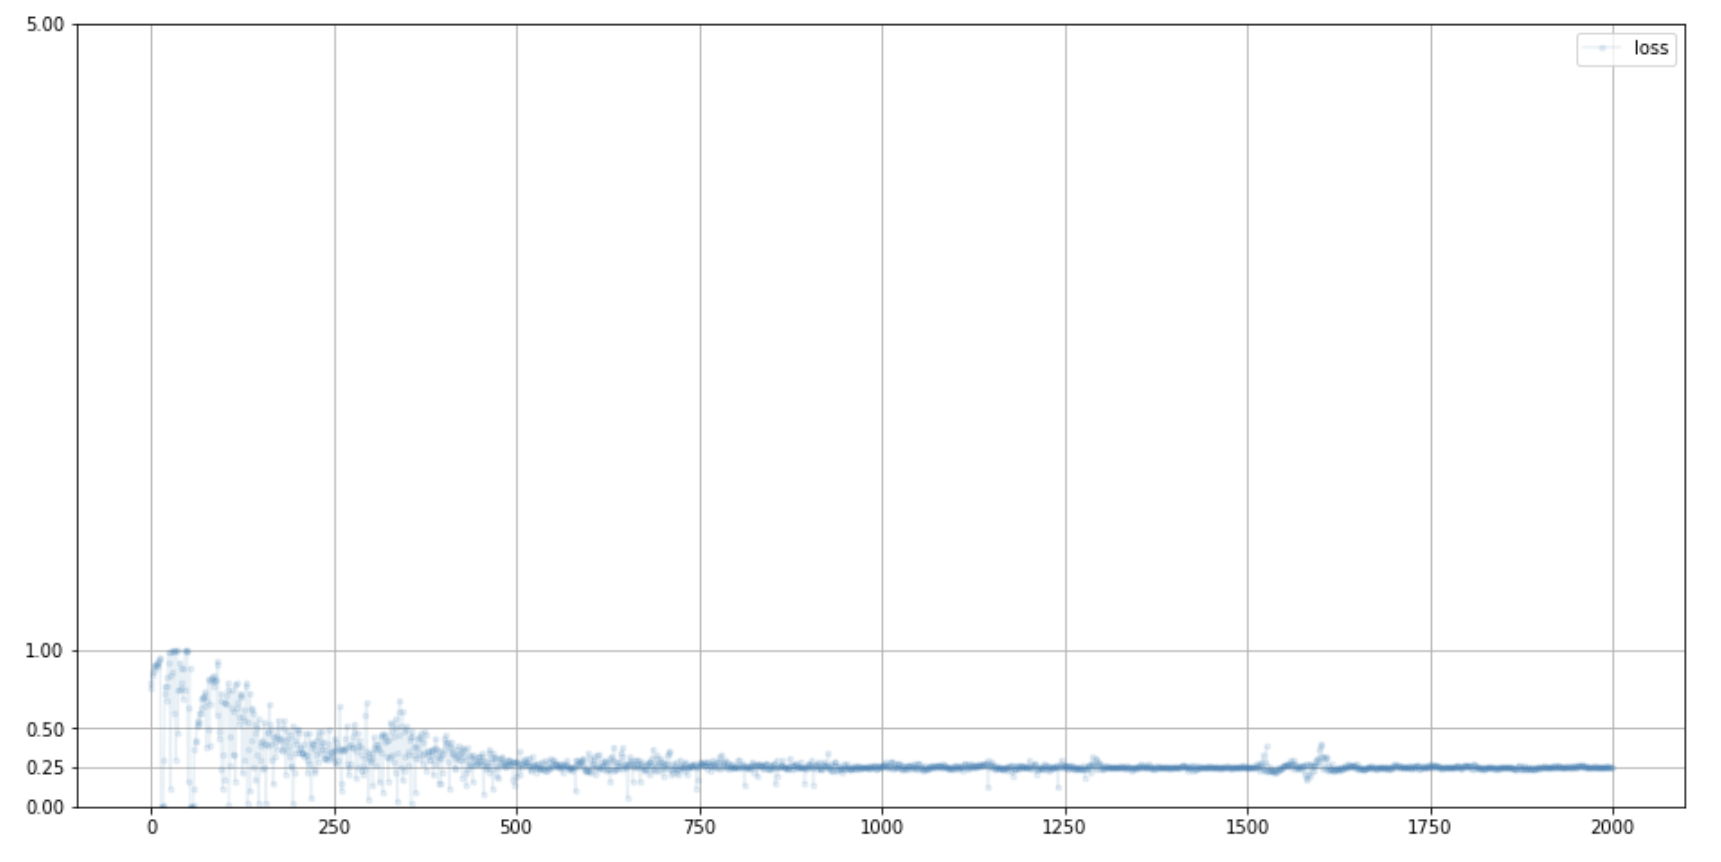
이렇게 해서, 손실이 줄어드는 형태까지 확인해봤습니다.
아까 생성했던 Generator의 이미지인 img가 어떻게 생성했는지 열어보겠습니다.
plt.imshow(img, interpolation='none', cmap = 'Reds')
좋습니다. 다음 시간에는 1) 실제로 얼굴 이미지를 학습한 GAN 모델이 어떤 얼굴을 생성해놓았는지
2) 각 함수가 바뀌고, 에포크가 늘어나면서 어떻게 변화하는지 확인하는 시간을 가져보겠습니다!
'딥러닝 > 개인구현 정리' 카테고리의 다른 글
| [DeepLearning] GAN을 활용한 새로운 산타클로스 얼굴 만들기 (0) | 2023.02.09 |
|---|---|
| [DeepLearning] GAN 모델 활용_CelebA얼굴 이미지 구분_2 (0) | 2023.02.08 |
| [DeepLearning] 이미지 구분 모델_Pokemon 809 세트_ep.2 (0) | 2023.01.31 |
| [DeepLearning] 이미지 구분 모델_Pokemon 809 세트_ep.1 (0) | 2023.01.26 |
| [이미지 처리] 타코와 브리또의 이미지 구분 모델 (0) | 2023.01.24 |


